


You press a key and nothing happens. Then another key, and still nothing. A laptop keyboard not working fault can freeze your whole day, because the keyboard is how you log in, how you type, and how you work. This guide walks through the causes in order, from a stuck setting to a tired driver, so you can find your cause and type again.
Laptop keyboard not working means the keys give no input, type the wrong letters, or only work now and then. Work through these fixes in order and test after each change. Most cases clear up in minutes, without a repair shop and without a new laptop.
Why Your Laptop Keyboard Stopped Working
A laptop keyboard not working fault has a short list of usual causes. A Windows update may have replaced the keyboard driver with a bad one. An accessibility setting called Filter Keys may be on, and it ignores quick key presses. The keyboard layout may have switched to another language, so keys type the wrong symbols. Crumbs or a spill may sit under the keys. A loose ribbon cable inside the laptop may cut the connection. The laptop keyboard not working fix below finds which cause is yours, then stops it.
First, notice the pattern before you change anything. If no key works at all, the fault is often a driver, a setting, or a loose connection. A few failing keys, on the other hand, usually point to dirt or damage under those keys. Wrong letters, meanwhile, usually mean the layout or Num Lock is the cause. The pattern tells you which laptop keyboard not working fix to try first.
Laptop Keyboard Not Working Fix 1: Restart the Laptop and Test Every Key
Most laptop keyboard not working cases start here. A restart clears a stuck driver state and a frozen input service, and it costs nothing. A full restart beats a sleep and wake cycle, because sleep keeps the same driver state.

- Restart the laptop fully: Click Start, then Power, then Restart. Do not choose Shut down and then press the power button, because fast startup on Windows 10 and 11 can keep the old driver state. A restart loads everything fresh.
- Open Notepad after the restart: Click Start, type Notepad, and press Enter. If the keyboard cannot type in the search box, use the mouse to open Notepad from the Start menu. Notepad is the best test app, because it shows exactly what each key types.
- Press every key, row by row: Start with the number row, then the letter rows, then the space bar and Enter. Watch the screen as you press. Write down which keys fail, if any.
- Test the keys at the login screen too: Lock the laptop with the Windows key and L, then try typing in the password box. If keys fail at the login screen as well, the fault sits below Windows, and Fix 2 and Fix 7 below apply.
- Try the function keys with Fn: On many laptops, the top row works as media keys unless you hold Fn. Hold Fn and press F1 or F2 to check. If a key only works with Fn, the keyboard is fine, and the Fn lock setting is the cause.
Tips for Testing Every Key
- Test in Notepad, not in a browser: A browser can block keys with a web page or an extension. Notepad shows the raw result, so a key that fails in Notepad truly fails.
- Check Num Lock first if letters type numbers: On laptops without a number pad, Num Lock can turn letter keys into numbers. Press Fn and Num Lock together, or press Num Lock alone, then test the letter keys again.
- Note the pattern before you move on: All keys dead in a laptop keyboard not working case points at a driver or a setting. One row dead points at the keyboard cable. A few keys dead points at dirt under those keys. The pattern saves you from trying fixes you do not need.
Laptop Keyboard Not Working Fix 2: Plug In an External Keyboard to Find the Fault
If the restart did not help, this one test splits the problem in half. An external keyboard tells you whether the fault sits in the built-in keyboard or in Windows itself. This is the fastest laptop keyboard not working test you can run, and it needs no download.
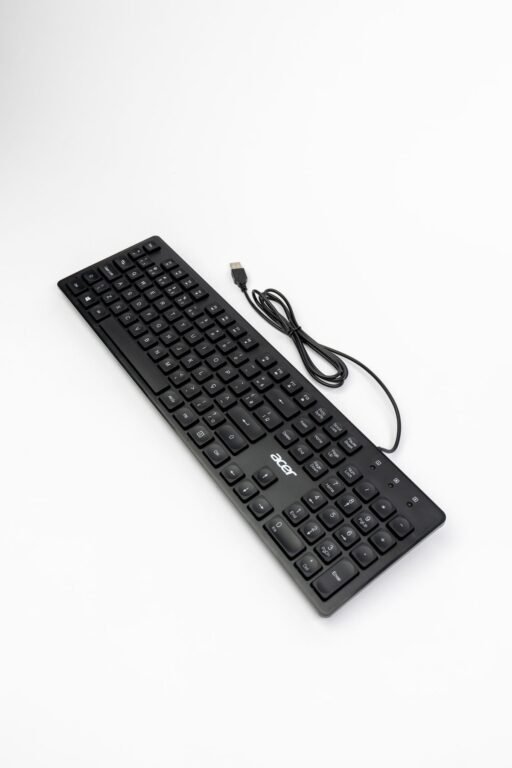
- Plug in a USB keyboard: Connect any USB keyboard to a USB port on the laptop. Windows installs it on its own in a few seconds. A keyboard from a desktop computer works fine for this test.
- Type in Notepad with the external keyboard: Open Notepad and type a full sentence. Test the same keys that failed on the built-in keyboard.
- Read the result: If the external keyboard types fine, the built-in keyboard or its cable is at fault, and Fix 6 below applies. If the external keyboard fails too, the fault sits in Windows, and Fix 3, Fix 4, and Fix 5 below apply.
- Try a second USB port if the keyboard is not found: A dead USB port can hide a good keyboard. Unplug the keyboard, wait five seconds, then plug it into a port on the other side of the laptop.
- Try a Bluetooth keyboard if you have one: Open Settings, then Bluetooth and devices, and pair the keyboard. A Bluetooth keyboard that works while the built-in one fails gives the same answer as a USB keyboard.
Offline alternative, no internet needed for this fix: An external keyboard needs no download and no driver from the internet. Borrow one from a friend or a desktop computer, plug it in, and test. It also works as a daily workaround while you wait for a repair.
Tips for Using an External Keyboard
- Check the batteries on a wireless keyboard: A wireless keyboard with dead batteries looks like a broken laptop keyboard. Put in fresh batteries, check the power switch on the keyboard, and reinsert the small USB receiver.
- Plug the keyboard straight into the laptop: A USB hub can fail while the laptop ports work fine. Plug the keyboard directly into the laptop for this test, not through a hub or a dock.
- A working external keyboard is a fine workaround: If the built-in keyboard is dead and a repair must wait, a small USB keyboard keeps the laptop fully usable. It costs far less than a repair, and it needs no setup.
Laptop Keyboard Not Working Fix 3: Turn Off Filter Keys and Check the Keyboard Layout
When a laptop keyboard not working fault starts with no clear cause, a setting is often the culprit. Filter Keys is an accessibility feature that ignores brief key presses, so fast typing looks like dead keys. A switched keyboard layout makes keys type the wrong symbols. Both settings change with one stray key press, and both are easy to undo.

On Windows 11
- Open the keyboard settings: Click Start, then Settings, then Accessibility, then Keyboard.
- Turn off Filter Keys: Find Filter keys and switch it off. While you are there, turn off Sticky Keys and Toggle Keys too, because they also change how keys behave.
- Check the keyboard layout: Go back to Settings, then Time and language, then Language and region. Click the three dots next to your language, then Language options, and check that the keyboard layout is the one you use, such as US QWERTY.
- Test the keys again: Open Notepad and type a sentence. If keys type the right letters now, the setting was the cause.
For Windows 10
- Open the keyboard settings: Click Start, then Settings, then Ease of Access, then Keyboard.
- Turn off Filter Keys: Under Use Filter Keys, switch it off. Turn off Sticky Keys and Toggle Keys on the same page.
- Check the keyboard layout: Click Start, then Settings, then Time and Language, then Language. Click your language, then Options, and check the keyboard layout listed there.
- Test the keys again: Open Notepad and type a sentence to confirm the fix.
On Windows 8 and 8.1
- Open the Ease of Access Center: Click Start, then Control Panel, then Ease of Access, then Ease of Access Center.
- Open the keyboard settings: Click Make the keyboard easier to use.
- Turn off Filter Keys: Untick Turn on Filter Keys, then click Apply and OK. Untick Turn on Sticky Keys on the same page.
- Check the keyboard layout: Press the Windows key and Space together to switch layouts. Keep pressing until the layout on screen matches the one you use, then test the keys in Notepad.
Fix It on Windows 7
- Open the Ease of Access Center: Click Start, then Control Panel, then Ease of Access, then Ease of Access Center.
- Open the keyboard settings: Click Make the keyboard easier to use.
- Turn off Filter Keys: Untick Turn on Filter Keys, then click Apply and OK. Untick Turn on Sticky Keys as well.
- Check the keyboard layout: Click the language icon in the taskbar near the clock and pick your usual layout, then test the keys in Notepad.
- Filter Keys turns on by accident: Holding the right Shift key for eight seconds opens the Filter Keys prompt, and one wrong click turns it on. If your keyboard started ignoring quick presses out of nowhere, this is the first setting to check.
- Sticky Keys also turns on by accident: Pressing Shift five times in a row opens the Sticky Keys prompt. Sticky Keys makes the computer wait for key combinations, so shortcuts and fast typing feel broken.
- Windows key and Space switches the layout: This shortcut is handy, but it also switches the layout by accident. If the @ key types a quote mark, or the quote key types @, the layout switched between US and UK. Press Windows key and Space to switch it back.
Laptop Keyboard Not Working Fix 4: Open the On-Screen Keyboard While You Fix It
If the physical keyboard stays dead after a laptop keyboard not working fault, the on-screen keyboard keeps you typing. It is built into Windows, it needs no download, and it also works as a test. If clicking the on-screen keys types fine but pressing the physical keys does nothing, Windows can accept input, and the fault sits in the physical keyboard, its cable, or its driver. That is useful proof before you open anything up.
On Windows 11 and Windows 10
- Open it with the keyboard shortcut: Press the Windows key, Ctrl, and O together. The on-screen keyboard appears at the bottom of the screen.
- Open it from Settings instead: If the shortcut does not work, click Start, then Settings, then Accessibility on Windows 11 or Ease of Access on Windows 10, then Keyboard, then turn on On-Screen Keyboard.
- Click the keys with the mouse or touchpad: Click each key to type. Click the Options key on the on-screen keyboard to turn on hover typing, which types a key when you hold the pointer over it.
- Use it to log in: At the login screen, click the Ease of Access icon in the bottom right corner, then tick On-Screen Keyboard. You can type your password with the mouse and get in.
For Windows 8, 8.1, and 7
- Open it from the Start menu: Click Start, then All Programs, then Accessories, then Ease of Access, then On-Screen Keyboard.
- Open it with Run: Press the Windows key and R together, type osk, then press Enter. This works on every Windows version from 7 to 11.
- Click the keys to type: Use the mouse or the touchpad to click each key. If the touchpad also stopped working, see our guide to a touchpad not working fix next.
Offline alternative, no internet needed for this fix: The on-screen keyboard is part of Windows itself. It runs fully offline, it needs no download, and it works even when the laptop has no internet at all.
- Keep it open while you work through the other fixes: The on-screen keyboard lets you type commands and passwords while the physical keyboard is down. Close it only after the physical keyboard types again.
- Test the same keys on screen and on the keyboard: Click a key on screen, then press the matching physical key. If the screen key works and the physical key does not, the fault is hardware or driver, not Windows.
Laptop Keyboard Not Working Fix 5: Update or Reinstall the Keyboard Driver
A Windows update often replaces the keyboard driver, and a driver made for an older Windows version can leave the keyboard dead. This is the most common laptop keyboard not working cause when the problem started the morning after an update, while an external keyboard still works fine. Microsoft support lists the same driver steps for a keyboard not working on a Windows 11 laptop.
On Windows 11 and Windows 10
- Open Device Manager: Right click Start, then click Device Manager. If the keyboard cannot type, use the mouse, or open the on-screen keyboard from Fix 4 and type with it.
- Find your keyboard: Expand Keyboards. Right click the entry named Standard PS/2 Keyboard or HID Keyboard Device.
- Update the driver: Click Update driver, then Search automatically for drivers. Install anything Windows finds, then restart the laptop.
- Reinstall the driver if updating does not help: Right click the keyboard entry again, then Uninstall device. Click Uninstall to confirm. Restart the laptop, and Windows installs a fresh driver on its own.
- Get the driver from the maker if Windows cannot find one: Visit your laptop maker support site and download the latest keyboard or chipset driver for your exact model. Install it, then restart.
For Windows 8, 8.1, and 7
- Open Device Manager: Press the Windows key and R together, type devmgmt.msc, then press Enter.
- Find your keyboard: Expand Keyboards and look for the Standard PS/2 Keyboard entry.
- Update the driver: Right click the keyboard, then Update Driver Software, then Search automatically for updated driver software.
- Get the driver from the maker: On Windows 7 especially, Windows Update rarely carries the right driver. Download it from your laptop maker support site for your exact model, install it, then restart.
Offline alternative, no internet needed for the reinstall: If the laptop has no internet, download the driver on another computer or on your phone, copy it to a USB stick, then plug the stick into the laptop and run the installer. The uninstall and restart steps in this fix work fully offline.
- Roll back the driver after a bad update: In Device Manager, right click the keyboard, then Properties, then the Driver tab, then Roll Back Driver if the button is not greyed out. This undoes a driver update that broke the keyboard.
- Check Windows Update for a newer driver: Open Settings, then Windows Update, then Check for updates. Driver updates also hide under Advanced options, then Optional updates, on Windows 11 and Windows 10.
- A yellow warning sign means a driver fault: In Device Manager, a yellow triangle on the keyboard entry means Windows sees the keyboard but its driver failed. Update or reinstall the driver first, before you suspect the hardware, in any laptop keyboard not working case.
Laptop Keyboard Not Working Fix 6: Clean the Keyboard and Check for Stuck Keys or a Spill
Dust, crumbs, and dried spills sit under the keys and stop them from pressing down. This laptop keyboard not working fix is hands on, so power the laptop off first and work gently. A few minutes of cleaning brings back keys that felt dead for weeks.
- Power the laptop off and unplug it: Click Start, then Power, then Shut down. Unplug the charger and remove any USB devices. Never clean a keyboard while the laptop is on, because stray presses can run commands.
- Turn the laptop upside down and shake it gently: Hold the laptop over a table, tilt it upside down, and shake it gently. Crumbs and dust fall out from under the keys. Tap the back of the laptop lightly while it is upside down.
- Blow out dust with compressed air: Hold the can upright and use short bursts, not one long spray. Hold the can upright, because tilting it can spray cold liquid onto the keys. Work across the keyboard in rows, from top to bottom.
- Press each key and feel for stuck ones: Press every key one by one. A stuck key feels soft, mushy, or lower than the rest. Press a stuck key several times to free it. A key that stays down has something wedged under it.
- Wipe the keys with a slightly damp cloth: Dampen a microfiber cloth with water, wring it out well, and wipe the keys. Never spray water or cleaner straight onto the keyboard, because liquid runs under the keys.
- Act fast if you spilled a drink: Power the laptop off at once and unplug it. Turn the laptop upside down so the liquid drains out, and leave it upside down for 24 to 48 hours. Do not turn it on to test it, because power and liquid together cause short circuits.
Cleaning Tips and Warning Signs
- Do not pry keycaps off unless the maker allows it: Most laptop keycaps snap off, but the small clips under them break easily. Check your laptop maker guide first. If the guide says nothing about removing keys, clean around them instead.
- One dead key usually means dirt, not a dead keyboard: A single key that fails while the rest work fine almost always has crumbs or a sticky spill under it. Clean that key first before you suspect the whole keyboard.
- A full row of dead keys points inside the laptop: Keys share a cable by row, so a whole row failing at once usually means a loose ribbon cable or a damaged keyboard. Cleaning will not fix that, and a repair shop is the next step.
Laptop Keyboard Not Working Fix 7: Test the Keyboard in BIOS and Run the Keyboard Troubleshooter
If every laptop keyboard not working fix above failed, this last set tells you whether the fault is hardware or software. The BIOS test runs before Windows loads, so Windows cannot interfere with it. The troubleshooter then checks the Windows side. Together, they give you a clear answer.
- Restart and open the BIOS screen: Click Start, then Power, then Restart. As soon as the screen goes dark, press the BIOS key again and again. The key is often F2, Delete, or Esc, and some laptops use F10. The maker logo screen may name the key.
- Try the arrow keys in the BIOS menus: Use the arrow keys to move through the BIOS menus. If the arrow keys move the selection, the keyboard hardware works, and the fault sits in Windows. Go back to Fix 3 and Fix 5.
- Read the result if no key works in BIOS: If no key responds in the BIOS screen either, Windows is not the cause. The keyboard, its cable, or its connection to the main board is at fault, and a repair shop is the next step.
- Exit the BIOS without changing anything: Press Esc, then choose Exit without saving, or press the key the screen names for exit. The laptop restarts into Windows as normal.
- Run the keyboard troubleshooter: On Windows 11, open Settings, then System, then Troubleshoot, then Other troubleshooters, then find Keyboard and click Run. On Windows 10, open Settings, then Update and Security, then Troubleshoot, then Additional troubleshooters, then Keyboard. On Windows 7, open Control Panel, then Troubleshooting, then Hardware and Sound, then Hardware and Devices. Follow the steps on screen.
- Test in Safe Mode as a final software check: Hold Shift while you click Restart, then choose Troubleshoot, then Advanced options, then Startup Settings, then Restart, then press 4 for Safe Mode. Test the keys in Notepad. If they work in Safe Mode, a startup app or a background program is blocking the keyboard, and a clean boot will find it.
More Checks Before a Repair
- Check for Windows updates before you give up: Open Settings, then Windows Update, then Check for updates. A later update often fixes a laptop keyboard not working fault that an earlier update caused, and it takes only a few minutes to check.
- Try a new user profile if the fault follows one account: If the keyboard works on another user account but not yours, your profile settings are at fault. A new local user account takes two minutes to create and confirms it.
- Back up your files before a repair: If the BIOS test points at hardware, copy your files to a USB stick or an external drive with the on-screen keyboard from Fix 4. A repair shop may need to open the laptop, and a backup keeps your files safe.
Tricks That Do Not Fix a Laptop Keyboard Not Working
Before you buy a new laptop or wipe the computer, skip these common myths. None of them fix a laptop keyboard not working fault, and some make it worse.
- Pressing the keys harder: Laptop keys need only a light press. Hammering a dead key does not fix the switch under it, and it can crack the keycap or the clip holding it.
- Shaking the laptop hard: A gentle shake upside down drops crumbs out. A hard shake can damage the hard drive or loosen a cable, and it turns a small fault into a big one.
- Pouring rice on the keyboard after a spill: Rice does not pull liquid out of a keyboard, and grains slip under the keys and jam them. Power off, drain, and dry is the real spill fix in Fix 6.
- Blasting it with a hair dryer on hot: Hot air can warp keycaps and push liquid deeper into the laptop. If you must dry a spill, use cool air and time, not heat.
- Reinstalling Windows first: A full reinstall is the last step, not the first. The seven fixes above solve nearly every laptop keyboard not working case, and a reinstall costs hours of setup.
- Paying for a keyboard fixer app: Most of these apps only run the same driver and troubleshooter steps from Fix 5 and Fix 7 and charge you for it. The steps are built into Windows, and they are free.
FAQ: Laptop Keyboard Not Working
Why did my laptop keyboard stop working all of a sudden? The usual causes are a Windows update that replaced the keyboard driver, Filter Keys turning on by accident, a switched keyboard layout, or a spill. A restart in Fix 1 and the Filter Keys check in Fix 3 solve most sudden cases in minutes.
Why do only some keys not work on my laptop? A few dead keys usually mean crumbs or a sticky spill under those keys, so clean them with Fix 6. If a whole row of keys fails at once, the keyboard cable inside the laptop is loose or damaged, and a repair shop should look at it.
Why does my laptop keyboard type the wrong letters? The keyboard layout probably switched to another language, or Num Lock is on. Press Windows key and Space to switch the layout back, and press Fn and Num Lock together to turn Num Lock off. Fix 3 covers both steps in full.
More Laptop Keyboard Questions
Can a Windows update break my laptop keyboard? Yes. An update can install a keyboard driver that does not match your laptop, and the keyboard stops working the next morning. Reinstall the driver with Fix 5, or roll the driver back in Device Manager, and check Windows Update for a newer fix.
Will an external keyboard work if my laptop keyboard is dead? Yes. Plug any USB keyboard into the laptop and Windows installs it on its own. It types normally, and it works as a daily workaround while you wait for a repair. Fix 2 shows how to use this test to find the fault.
How much does a laptop keyboard replacement cost? The price depends on the laptop model, because some keyboards are cheap parts and some are built into the top case. A repair shop can quote it in a few minutes, and many shops fit a new keyboard the same day. Until then, a USB keyboard from Fix 2 keeps the laptop fully usable.
Final Words
A laptop keyboard not working fault feels like the laptop is dead, but the cause is usually small. A restart fixes most cases. Filter Keys, a switched layout, or a tired driver fixes most of the rest. Work through the laptop keyboard not working fixes in order, test after each change, and stop as soon as the keys type again. If the keys fail in the BIOS screen too, the fault is hardware, so back up your files and visit a repair shop. If the touchpad stopped working at the same time, see our guide to a touchpad not working fix, because the two faults often share one cause.